Clickiny allows you to automatically send confirmation emails to respondents after they submit a form. This is useful for sending thank-you messages, order confirmations, or additional instructions. Follow these steps to set up respondent email notifications.
Prerequisite
Before setting up the email notification, ensure your form includes an email field to collect respondent emails.
Enabling Respondent Email Notifications
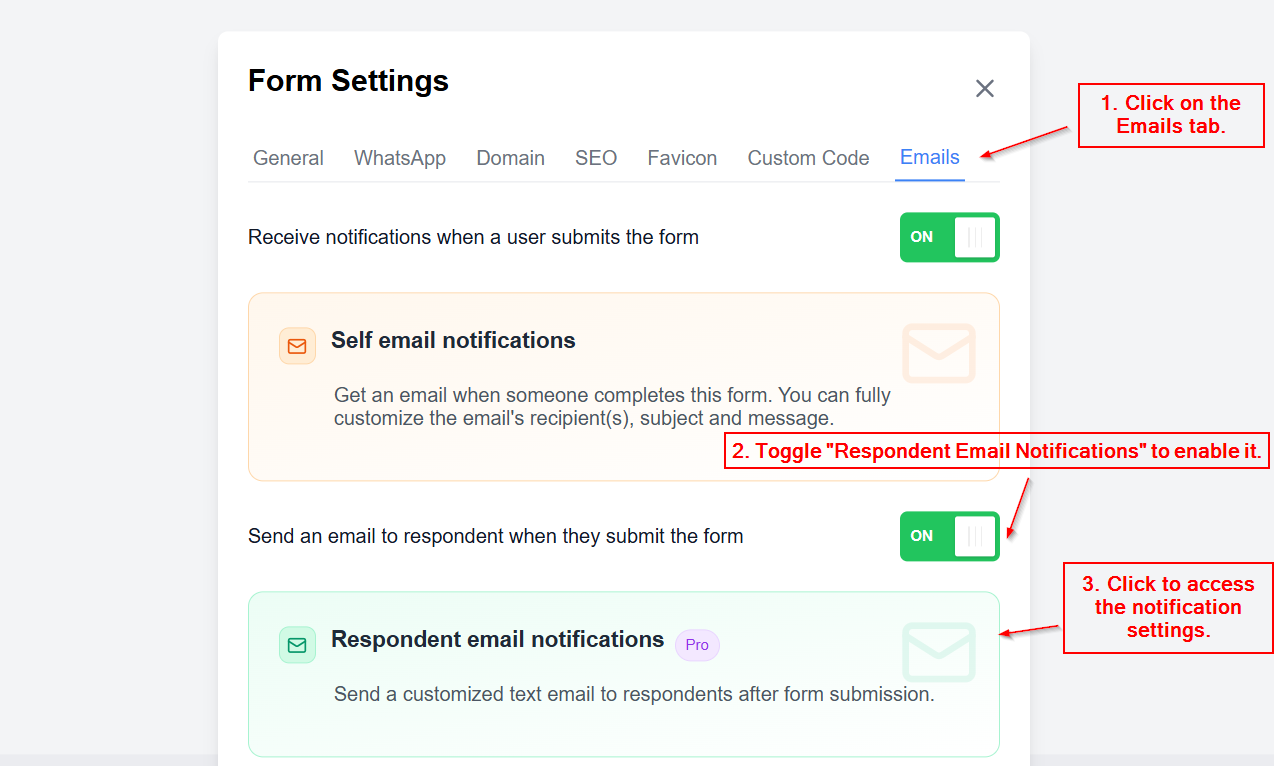
- Open the Form Builder and go to Settings.

- 2. Click on the Emails tab.
- 3. Toggle “Respondent Email Notifications” to enable it.
- 4. Click to access the notification settings.

Configuring the Email Content
Once enabled, customize the email details:
- Sender Name – Define the name that will appear as the sender.

- Email Subject – Set the subject line for the respondent’s email.

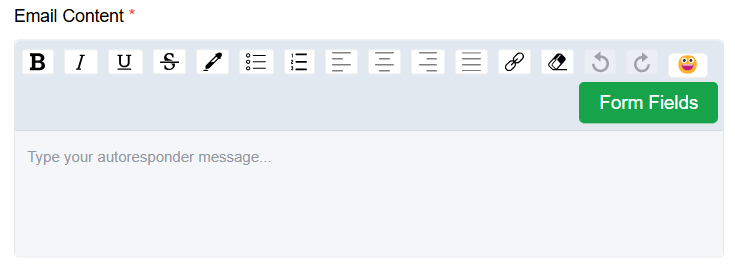
- Email Content – Write a personalized message that respondents will receive.

💡 You can insert form responses directly into your emails! Learn how to Use Form Fields in Your Email Notifications.
Setting Up the Recipient Details
- Go to the Recipients tab.
- Reply-To Address – Set an email address where respondents can reply if needed.
- This is the email that will receive responses if a user replies to the notification email.
- Recipient Email – Select the form’s email field to determine where the notification should be sent.
- By default, Clickiny selects the first email field in your form.
- If your form has multiple email fields, you can switch to the correct one.
If you want to send a PDF copy of the form submission or attach additional files, check out How to Send File Attachments to Form Respondents.
Once configured, Clickiny will automatically send a customized email to each respondent upon form submission. This feature ensures a seamless communication flow, helping you keep respondents informed instantly