With Clickiny, you can set up custom email notifications to receive form submissions directly in your inbox. Follow these steps to configure your email notifications and even receive responses as PDFs.
Enabling Email Notifications
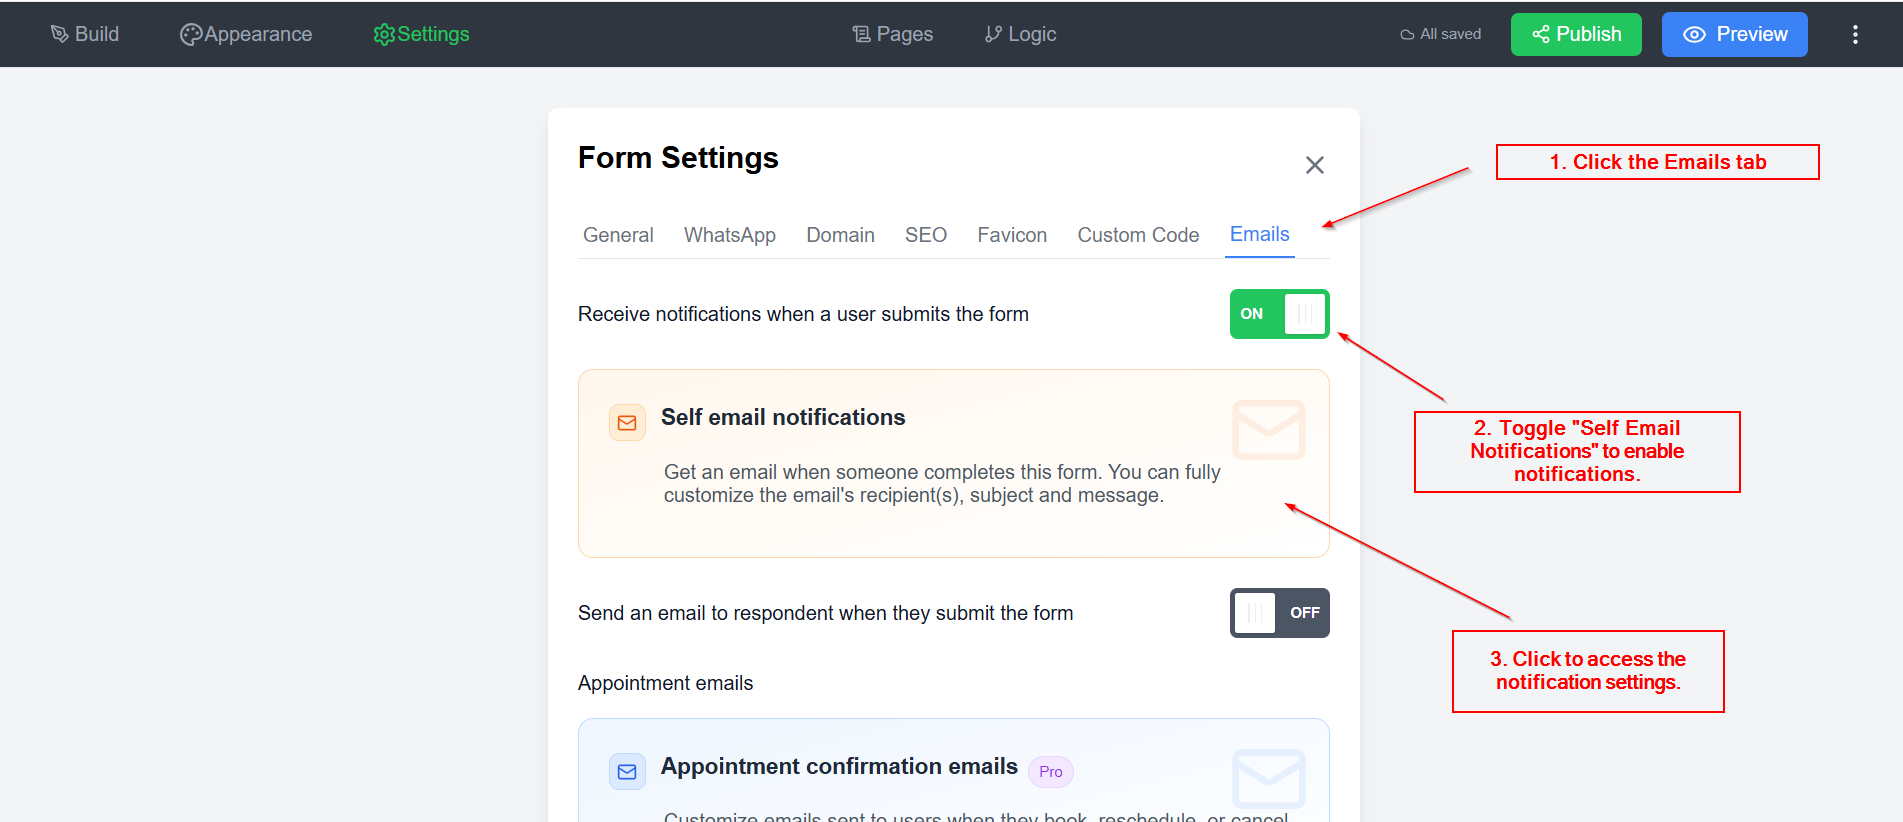
- Open the Form Builder and navigate to Settings.

- 2. Click the Emails tab.
- 3. Toggle “Self Email Notifications” to enable notifications.
- 4. Click to access the notification settings.

Configuring Email Notifications
Once enabled, set up the following details:
- Recipients – Enter the email addresses that should receive notifications.

- Sender Name – Define the name that appears as the sender. Defaults to “Clickiny”.

- Email Subject – Customize the subject line for incoming notifications.

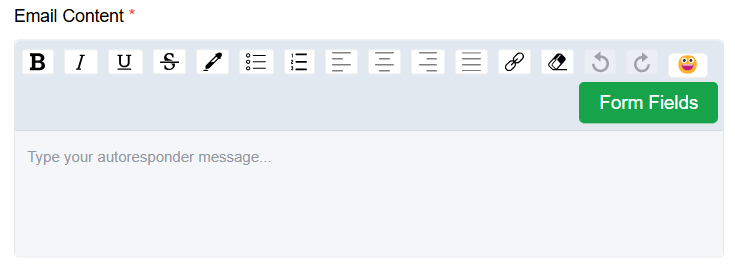
- Email Content – Personalize the message body with form submission details.

💡 Want to personalize your email with form responses? Learn how to Use Form Fields in Your Email Notifications.
Receiving Submissions as a PDF Attachment
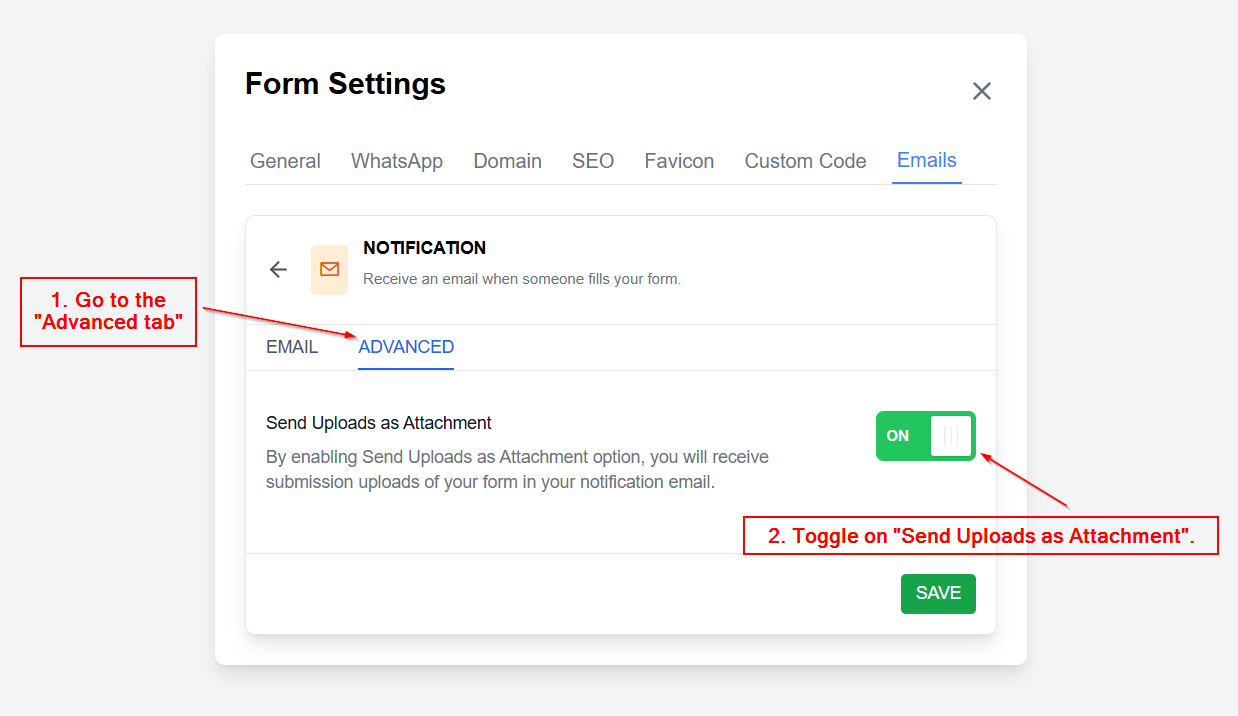
- Go to the Advanced tab.
- Toggle on “Send Uploads as Attachment”.
- When enabled, form responses will be automatically sent as PDFs to the designated recipients.

By setting up custom email notifications, you can streamline how you receive and manage form submissions, ensuring that all responses are stored and accessible in your inbox.
Was this article helpful?