Clickiny makes appointment management effortless with its dedicated booking form, enabling businesses to handle bookings seamlessly. It offers features like customizable appointment lengths, availability settings, and more. Here’s a step-by-step guide to creating and personalizing an appointment booking form using Clickiny.
How to Set Up an Appointment Booking Form with Clickiny
Imagine running a hair salon where clients can book services like haircuts, coloring, and styling with just a few clicks. With Clickiny, you can design a tailored booking form that aligns perfectly with your salon’s offerings and schedule. Setting it up is fast and hassle-free.
Step 1: Create a New Form
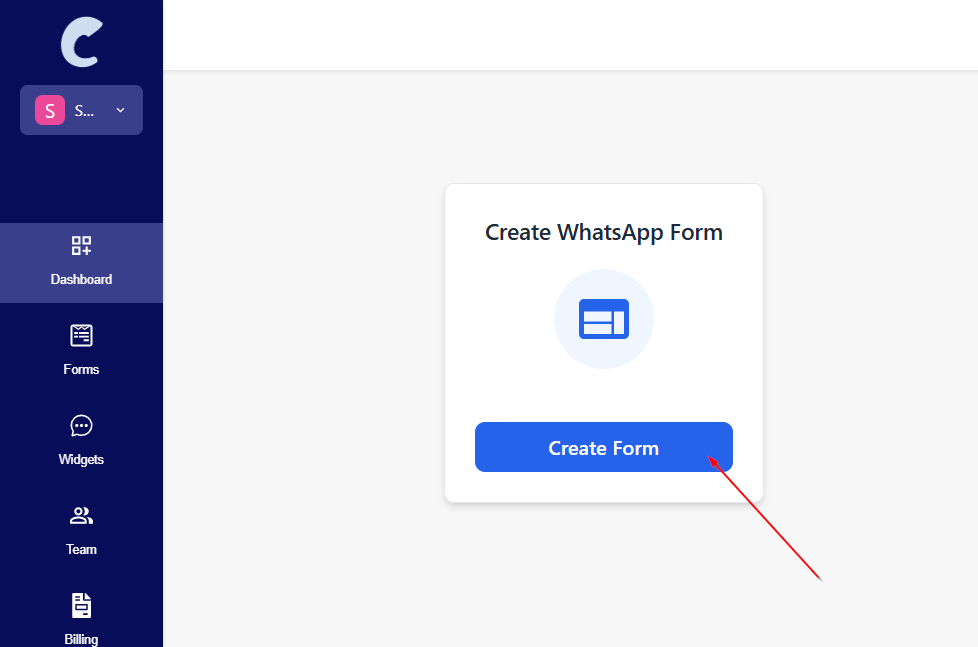
On the Clickiny dashboard, select “Create Form” and input your WhatsApp phone number when prompted. This ensures that all appointment requests are sent straight to your WhatsApp inbox for easy access.
Step 2: Add the Appointment Form Element
The Appointment Form element is an essential tool for setting up customized scheduling options for your hair salon. Follow these steps to add and configure it in your booking form:
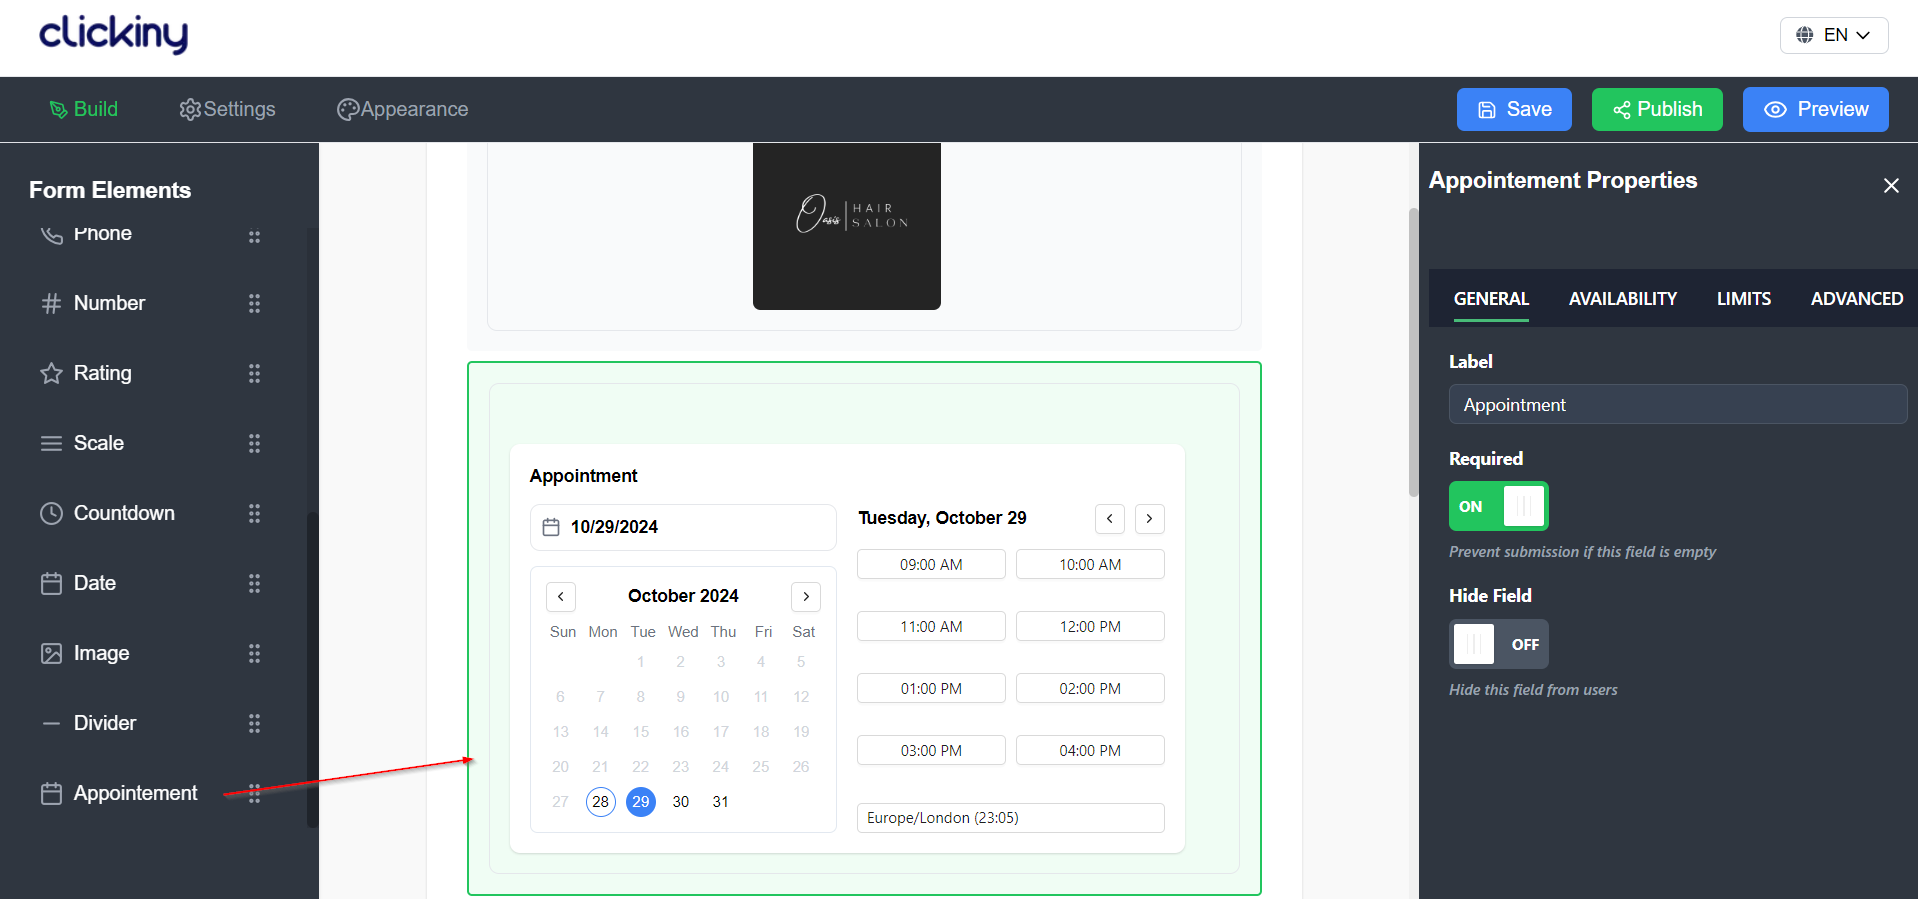
- Find the Appointment Form Element: In the Clickiny form builder, locate the Appointment Form option in the sidebar. This feature is tailored for managing appointments, making it perfect for your salon.
- Add to Your Form: Drag the Appointment Form element from the sidebar and drop it into your form workspace. This will create a dedicated section for scheduling appointments.
Step 3: Configure Appointment Settings
After adding the Appointment Form element to your booking form, the next step is to customize its settings to match your hair salon’s schedule. Proper configuration ensures clients can book appointments seamlessly while aligning with your availability. Follow these steps to set up your appointment settings:
Set Appointment Duration:
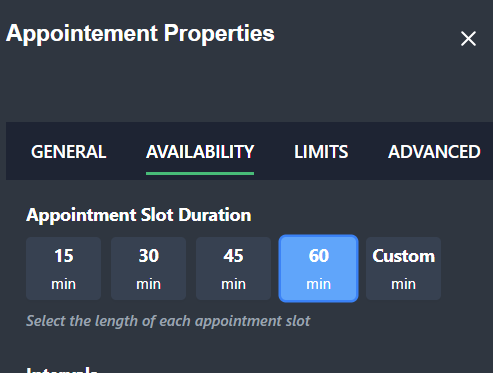
Set the duration for each appointment based on the service. For example, a standard haircut might take 30 minutes, while color treatments could require 45 minutes, and special styling sessions might take 60 minutes. Defining these time slots ensures clients understand how much time to reserve for their visit.
Define Available Days and Times:
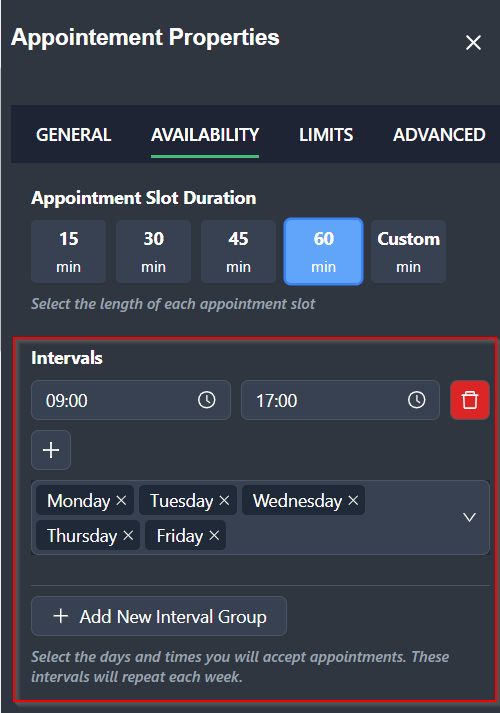
Indicate the days your salon is available for appointments. Choose the days you want to accept bookings (e.g., Monday through Saturday) and set your operating hours for each. For instance, you might be open from 9 AM to 5 PM on weekdays and offer extended hours on Saturdays.
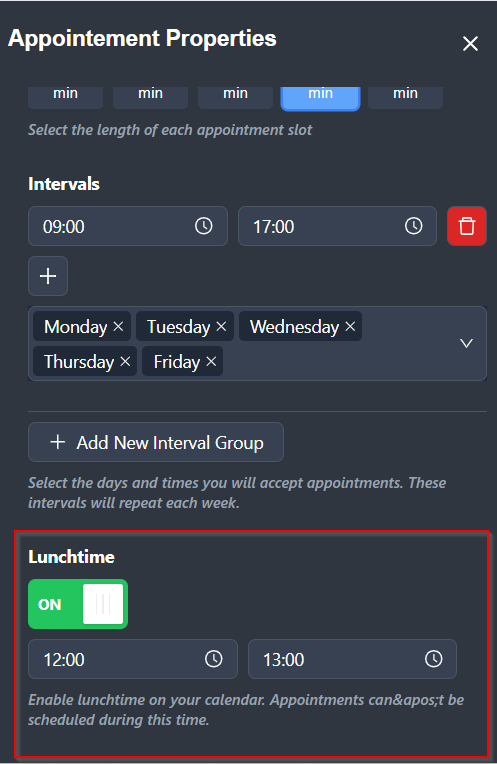
Block Off Lunchtime and Other Breaks:
Block off specific times to avoid bookings during your lunch break. For example, if your salon is closed from 12 PM to 1 PM for lunch, configure the schedule to make this time unavailable. This ensures a well-organized schedule for both you and your staff.
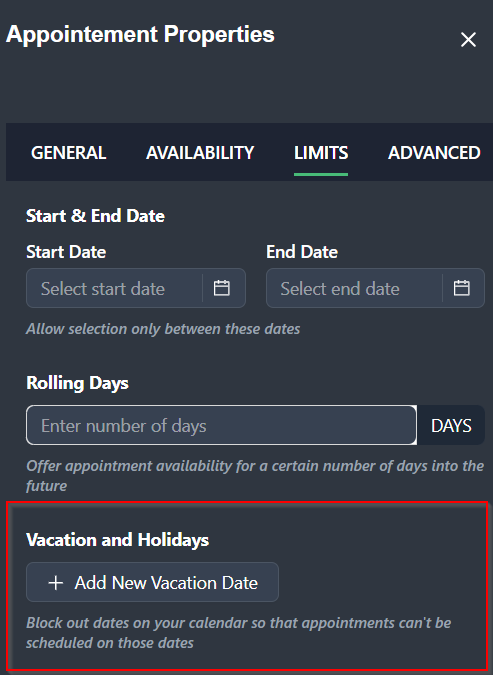
Manage Holidays and Vacations:
Plan ahead by setting your holiday and vacation schedule. Add any dates your salon will be closed, such as public holidays or personal leave. This ensures clients can’t book appointments during those times, helping to prevent misunderstandings and reduce the chance of cancellations or no-shows.
Properly setting up your appointment settings ensures a smooth booking process for clients while keeping your salon’s schedule well-organized. This level of precision improves customer satisfaction and supports an efficient appointment management system.
Step 4: Add other Form Fields
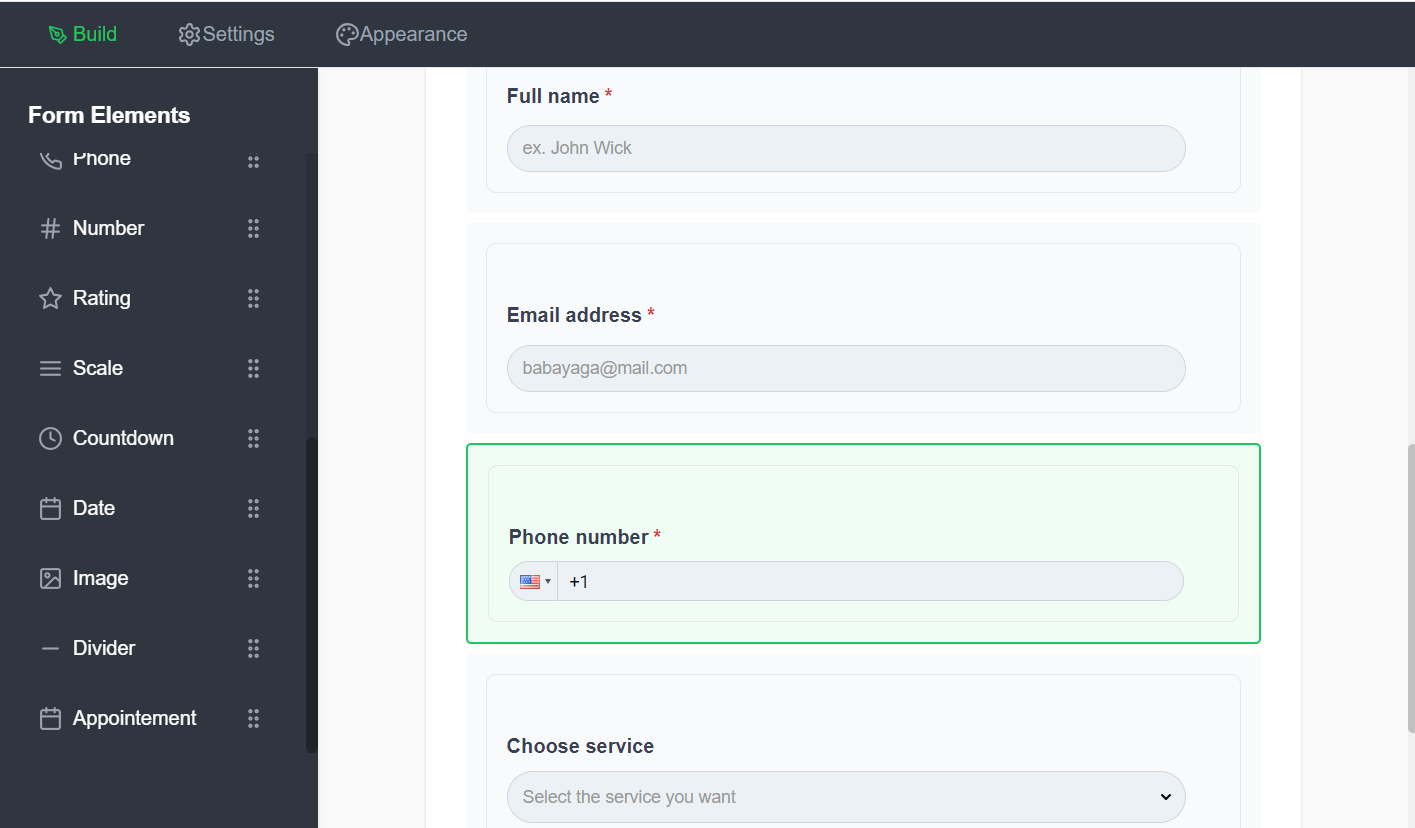
Next, you’ll need to set up the key fields that clients will complete to book their appointment. In the Clickiny form builder, simply drag and drop the fields to customize your form:
- Client Name: Add a field for clients to enter their name, making interactions more personal.
- Phone Number: This field is essential for confirming bookings and enables easy follow-up if needed.
- Email Address: Include this field for an alternative way to contact clients or send appointment confirmations.
- Service Type: Offer a dropdown or checklist for clients to choose services such as “Haircut,” “Color,” or “Styling.” This helps you prepare and manage their appointment time effectively.
Step 5: Preview the Form
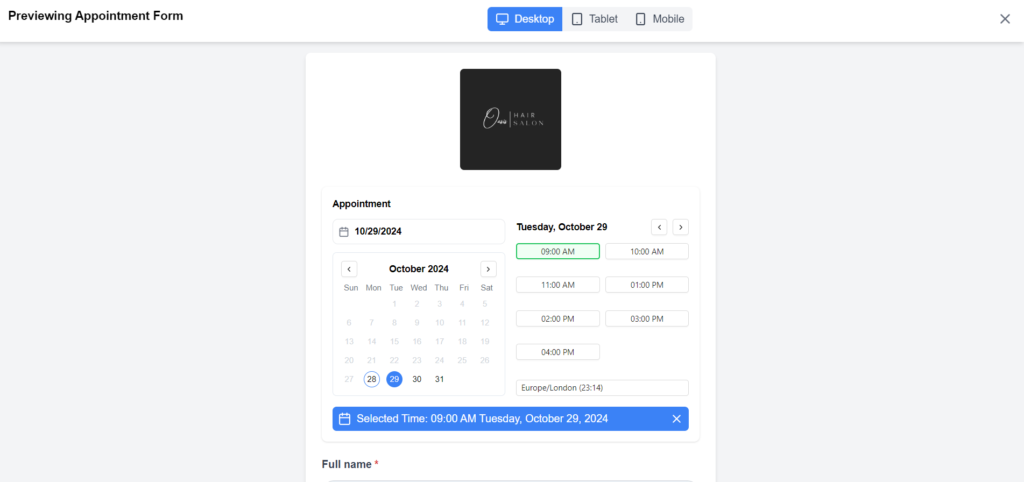
Once you’ve set up your appointment form, it’s important to preview it to make sure everything works as expected. Here’s how:
- Preview the Form: Click the “Preview” button at the top of the form builder to see how it will look to your clients.
- Test the Features: Go through the form as if you were a client—fill in the fields, choose appointment times, and check that all options are functioning correctly.
- Review Layout and Clarity: Ensure the layout is organized and easy to understand, with all fields clearly labeled and visible.
- Make Changes: If you spot any issues or areas for improvement, go back to the builder to make adjustments.
Taking time to preview and test the form helps ensure a seamless booking experience for your clients.
Step 6: Click Save
When you’re happy with the layout and fields of your WhatsApp appointment booking form, click the “Save” button to save your progress and prepare the form for publication.
Step 7: Publish and Share Options
After finalizing your appointment form and completing the preview, it’s time to publish it and make it available to your clients. Here’s how to do so efficiently:
Click the Publish Button:
Find and click the “Publish” button in the form builder. This will make your form live, enabling clients to begin booking appointments.
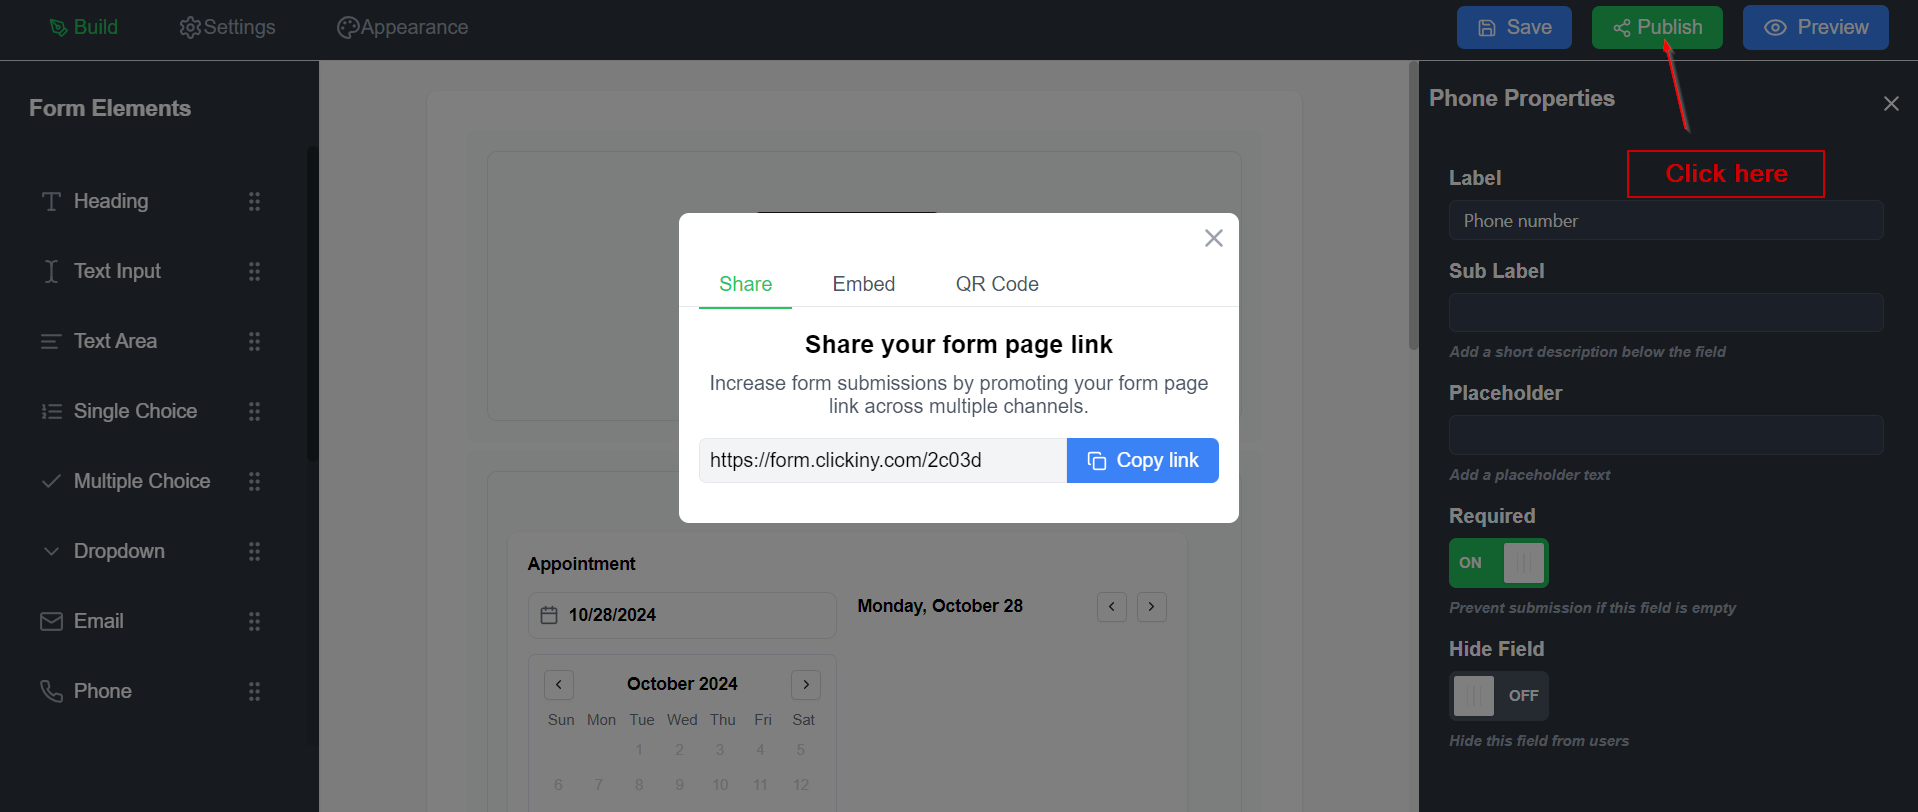
Select Sharing Options:
Once your form is published, you’ll have several options to share it effectively:
- Embed on Your Website: If your salon has a website, select the option to obtain the embed code. This allows you to add the form directly to your site, so visitors can book appointments without leaving the page.
- Generate a Direct Link: A direct link will be created for you automatically. You can share this link via email, social media, or messaging platforms, offering a quick and easy way for clients to schedule appointments.
- Create a QR Code: For in-person marketing, generate a QR code that clients can scan with their smartphones. This is ideal for signage, flyers, or business cards, providing instant access to the booking form.