When setting up an appointment form in Clickiny, you can define the type of location for your appointments. Clickiny supports two location types: Physical Location and Virtual Meeting. Follow the steps below to configure the location settings for your appointment form.
Setting Up a Location
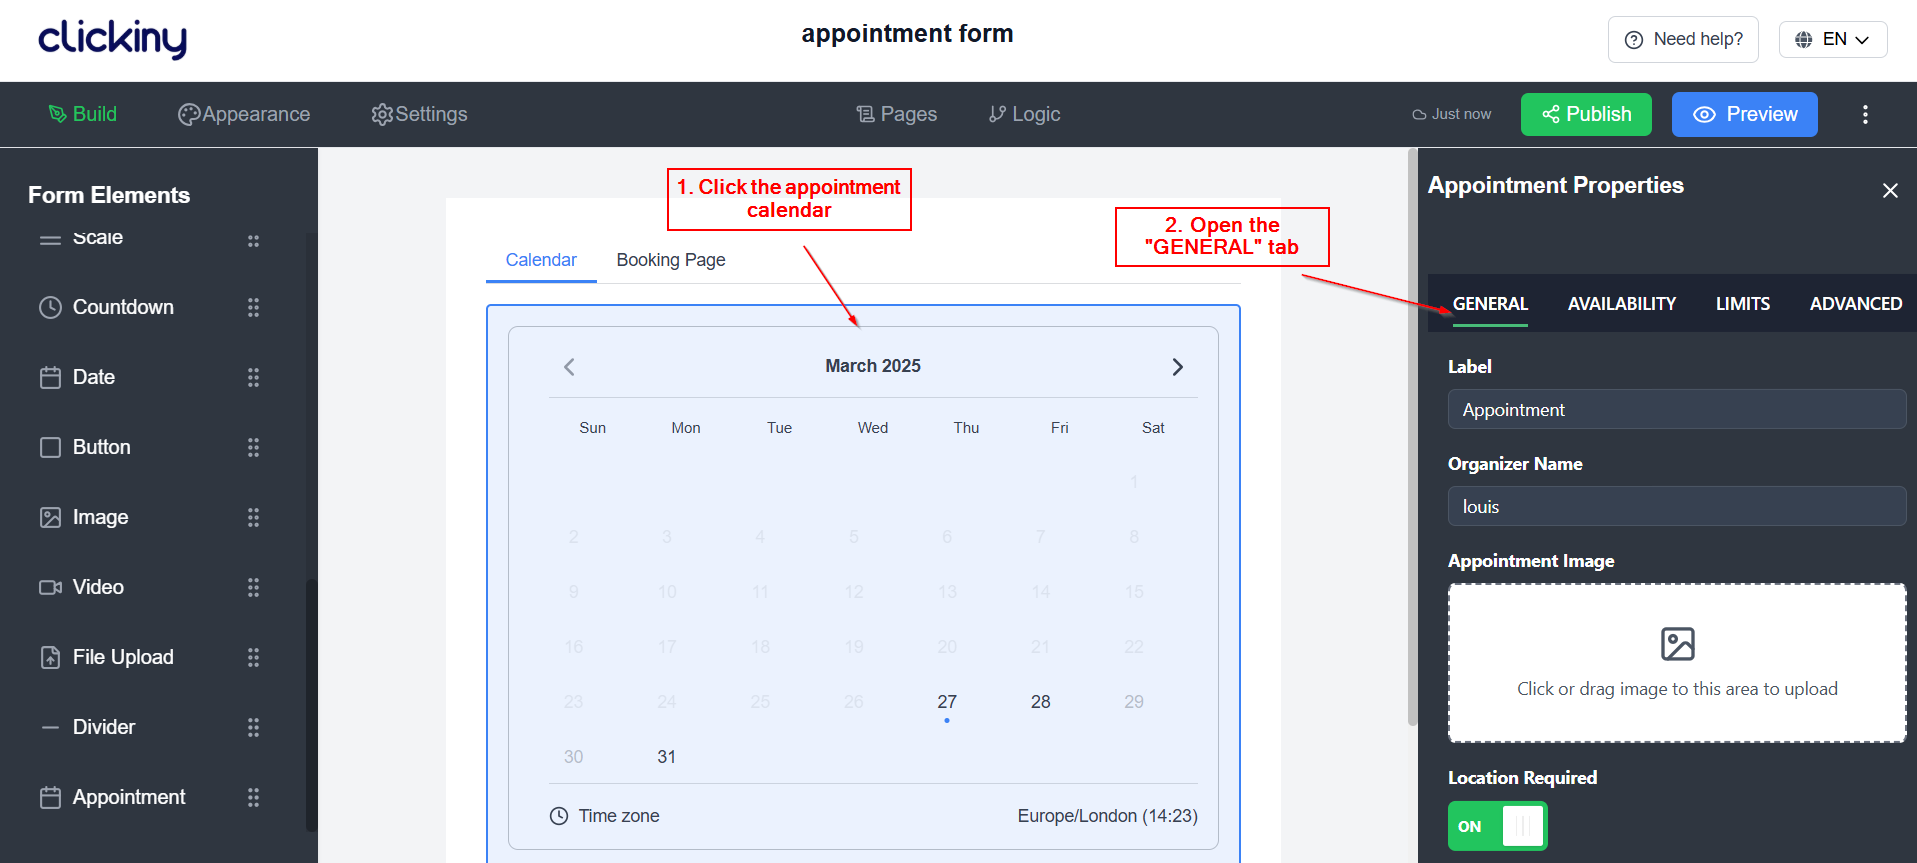
1. Open the Appointment Calendar
- Navigate to your form that contains an appointment element.
- Click on the Appointment Calendar to access its settings.
2. Access the Properties Panel
- Once you click on the calendar, the Properties Panel will open on the right side of the screen.

3. Choose the Location Type
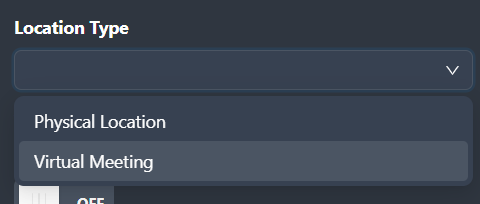
- In the GENERAL tab, scroll down to Location Type.
You will see two options:
- Physical Location
- Virtual Meeting

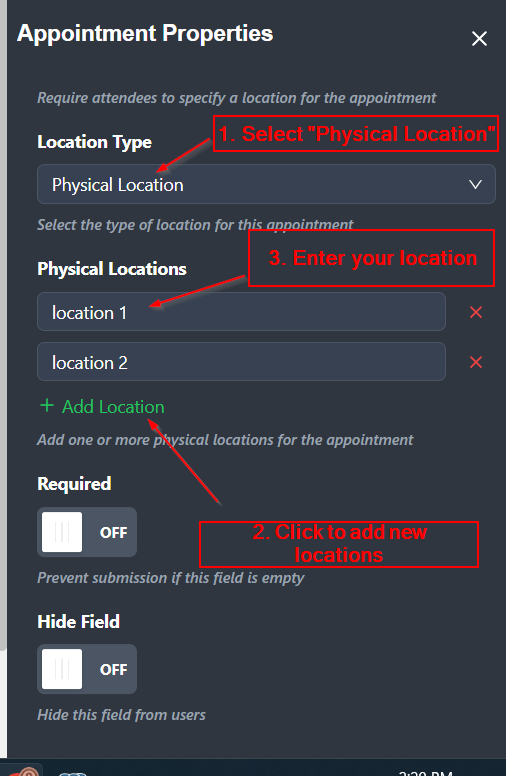
Physical Location
- Select Physical Location if your business requires customers to visit a specific place.
- You can enter one or multiple addresses, allowing users to choose from different locations when booking an appointment.

Virtual Meeting
- Select Virtual Meeting if your appointments will be conducted online.
- Choose from a list of supported virtual platforms like Zoom, Google Meet, or Microsoft Teams.
- If your preferred platform is not listed, select Other and manually enter your meeting link.
Finalizing Your Settings
After selecting the appropriate location type, your appointment form will reflect the chosen options. Users booking an appointment will be able to see and select the available locations accordingly.
Was this article helpful?