Creating your Clickiny WhatsApp Form is a breeze. Let’s get started!
Creating a WhatsApp Form
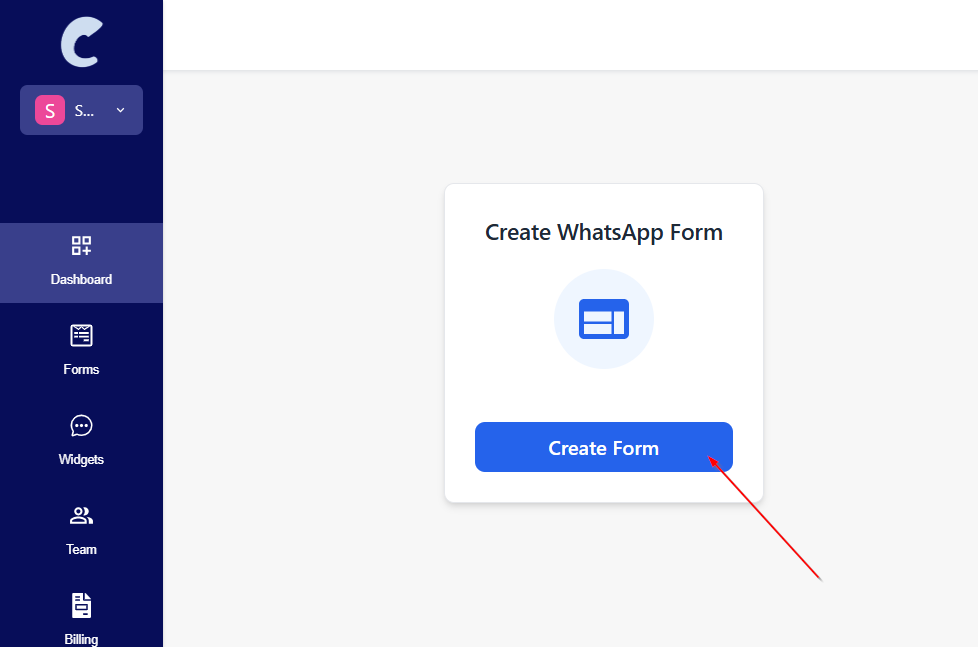
- On the Dashboard, click Create WhatsApp Form button.
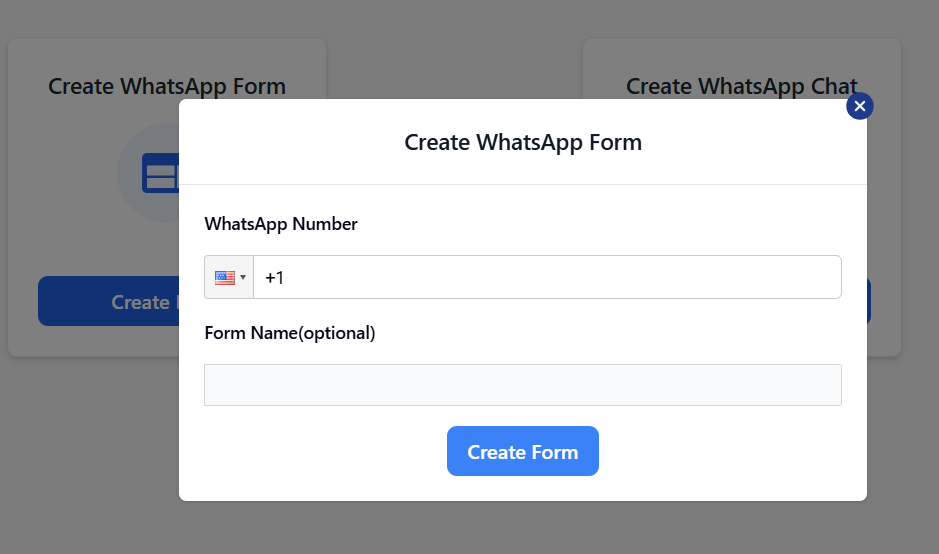
2. Enter your WhatsApp phone number and form name(optional) in the pop-up.
Clickiny Form Builder
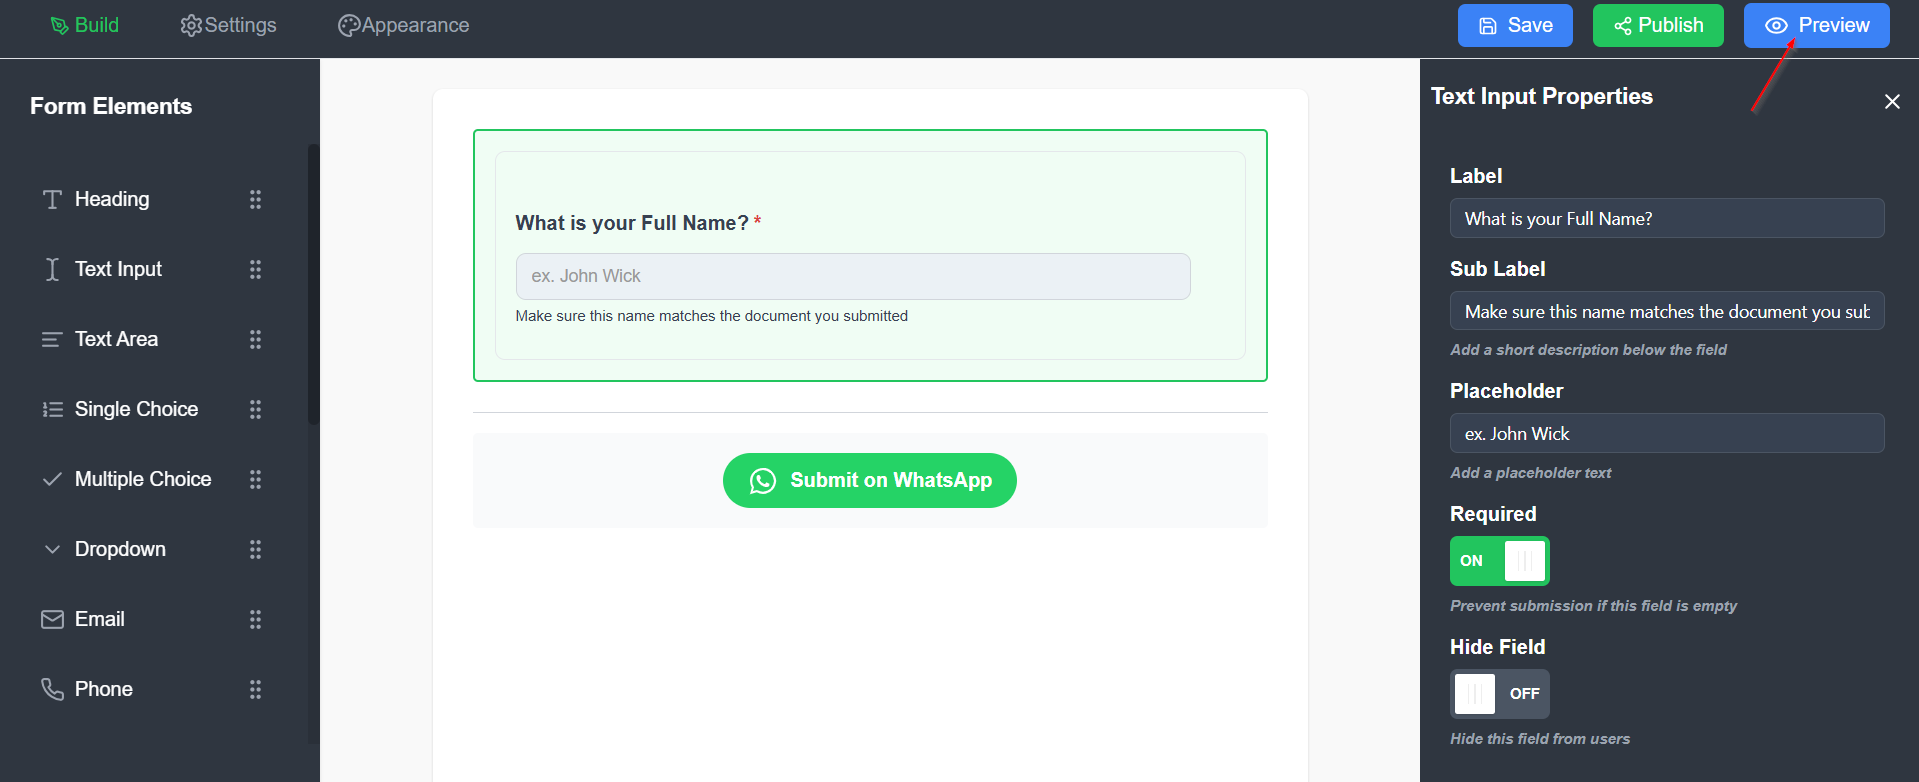
You’re now in the builder, where you can start adding questions to your form. Here’s what the builder looks like.
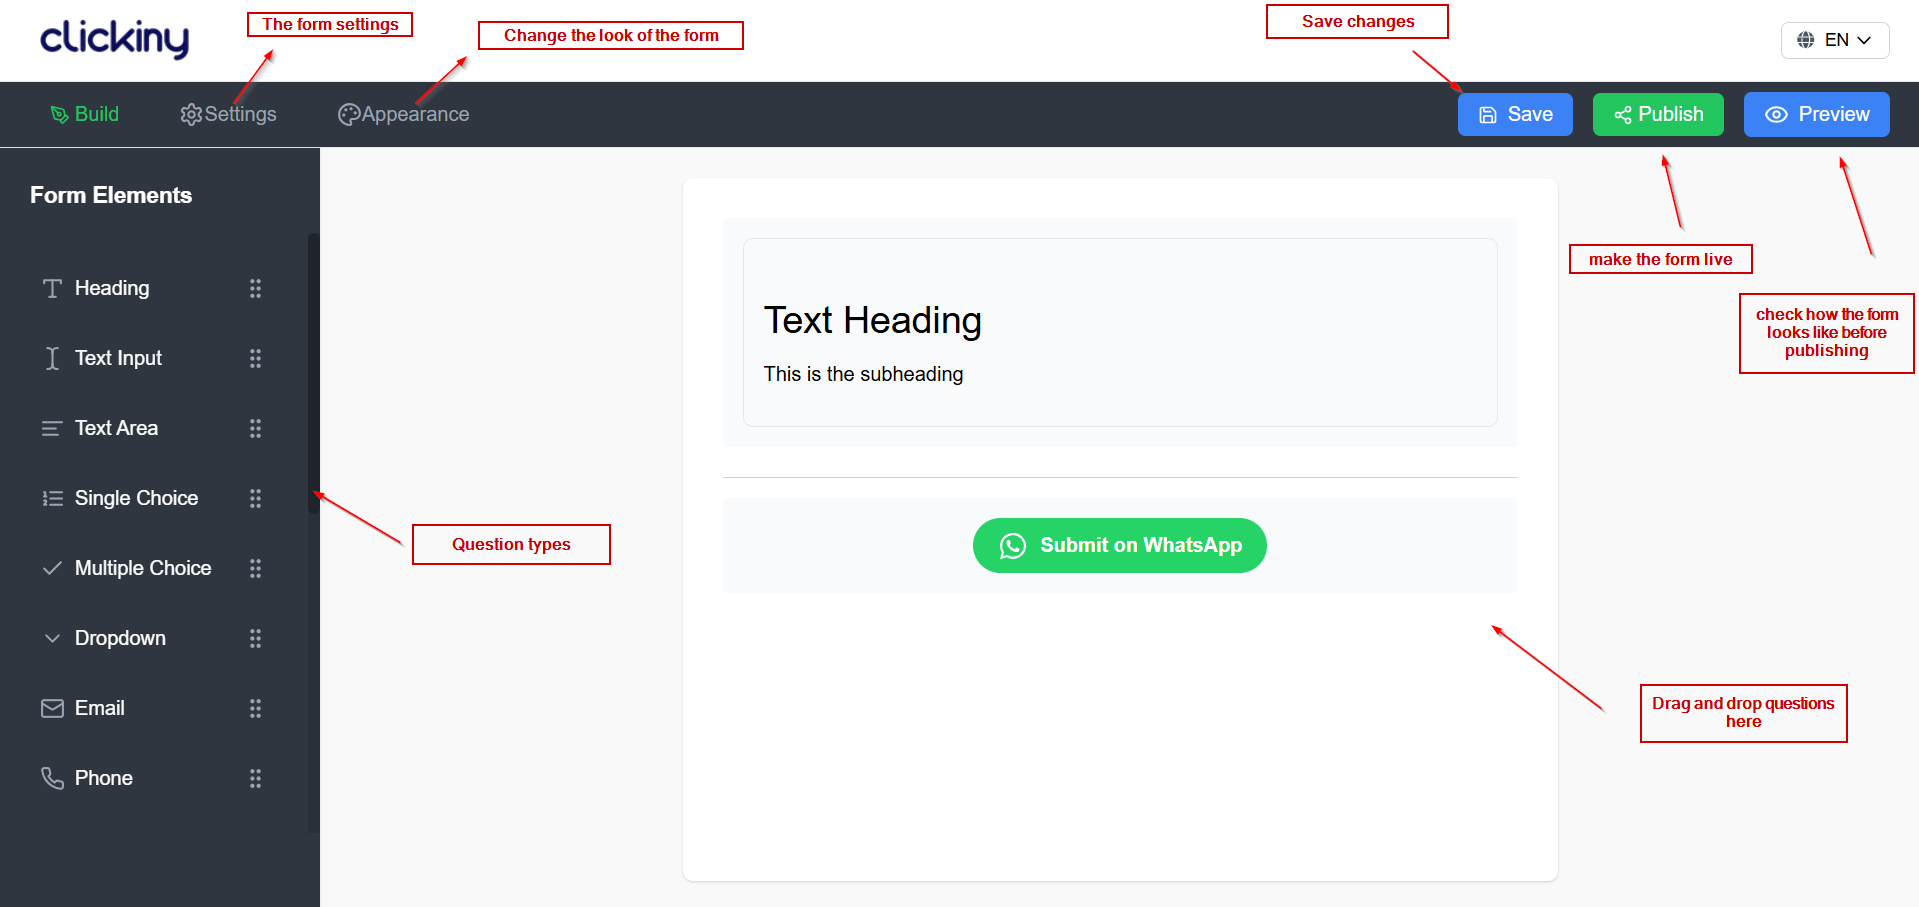
On the left-hand side, you’ll find a variety of question types to choose from. Simply drag and drop them into the main workspace. Start by adding a Text Input question to get going!
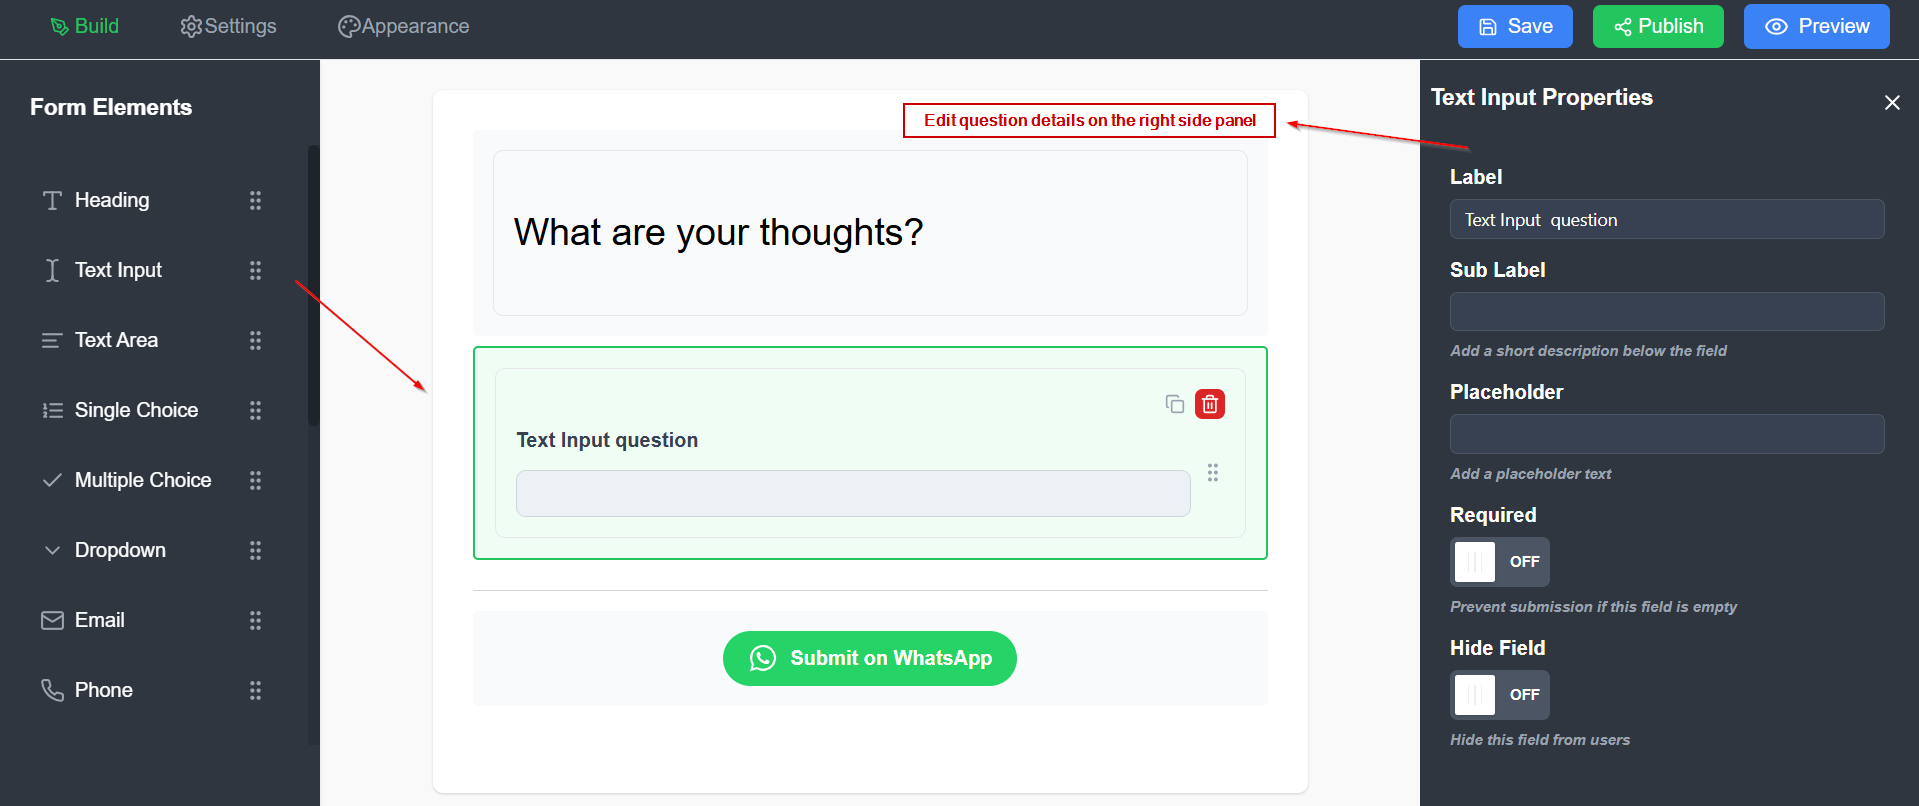
Customize your Text Input question as needed. In this example, we’ve added the question text, a placeholder, extra details, and marked it as a required field. Once you’re happy with your question, click on “Preview” to make the changes live.
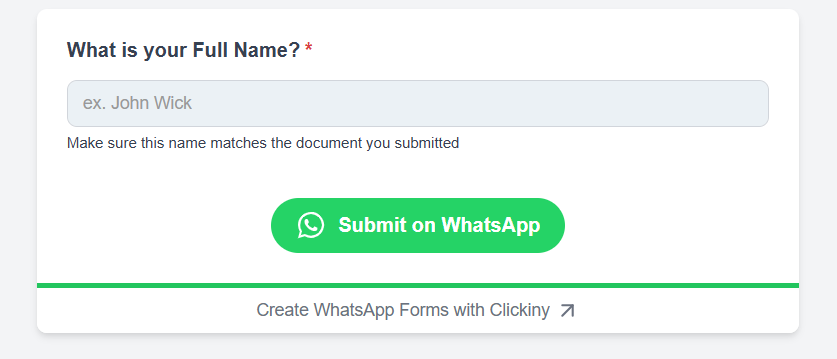
Now, you can see what your form looks like. You can click the submit button to test the form.
Publish Your Form
Add more questions to your form using the builder and customize them as needed. Adjust the text, placeholders, details, or settings for each question to suit your form’s purpose. Once you are satisfied with the form click the Publish button. You’ll be presented with various sharing options to distribute your form effectively.
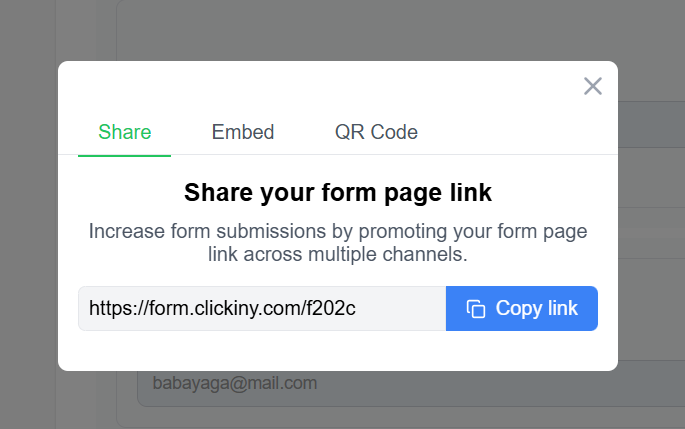
Embed on Your Website: If you have a website, you can generate an embed code to integrate the form directly into your site.
Share a Direct Link: A direct link to your form will be automatically generated. Share it via email, social media, or messaging platforms to give clients an easy way to use your form online.
Use a QR Code: For in-person promotions, create a QR code that clients can scan with their smartphones. Perfect for in-store signage, flyers, or business cards, this makes accessing the form quick and effortless.